Building a Cedar-Strip Canoe - Nolan Brey
The beginning of a journey / making the forms
June 7, 2019
I'm not sure when I first had the idea that I should build a cedar-strip canoe. My dad has been talking about it for years, so maybe that's where it started. Regardless, late last year when I had just moved to a new city, I found myself with an unexpected amount of free time.
I really do need to be busy. I go stir crazy with too much down time (just as I tend to go stir crazy with too much to do). I decided to really fully commit and do it.
I am certainly not averse to starting ambitious personal projects such as this, but I am aware that I do have a certain aversion to actually completing these projects… but this time was going to be different for two important reasons:
- I have a Boundary Waters trip planned with my dad in early September and it would be pretty sweet to paddle my own canoe
- My lease is up at the end of August and if I don't finish I'll have to get rid of $1,000 worth of raw materials
So I set off, paddling into the unknown world of cedar-strip canoe building, armed only with a basic knowledge of woodworking, some simple tools, the internet, and a copy of Canoecraft by Ted Moores.
My canoe building exercise began by sourcing plans. I ultimately decided upon the Cruiser design by Northwest Canoe, because the company is local and the plans are available for free on their website.
From there, I found a printer that could print the plans 1:1 (the FedEx office store in downtown Minneapolis, believe it or not), got my plans made, and headed up to my dad's garage in St. Cloud for a couple weekends to start drawing up and cutting out my forms.
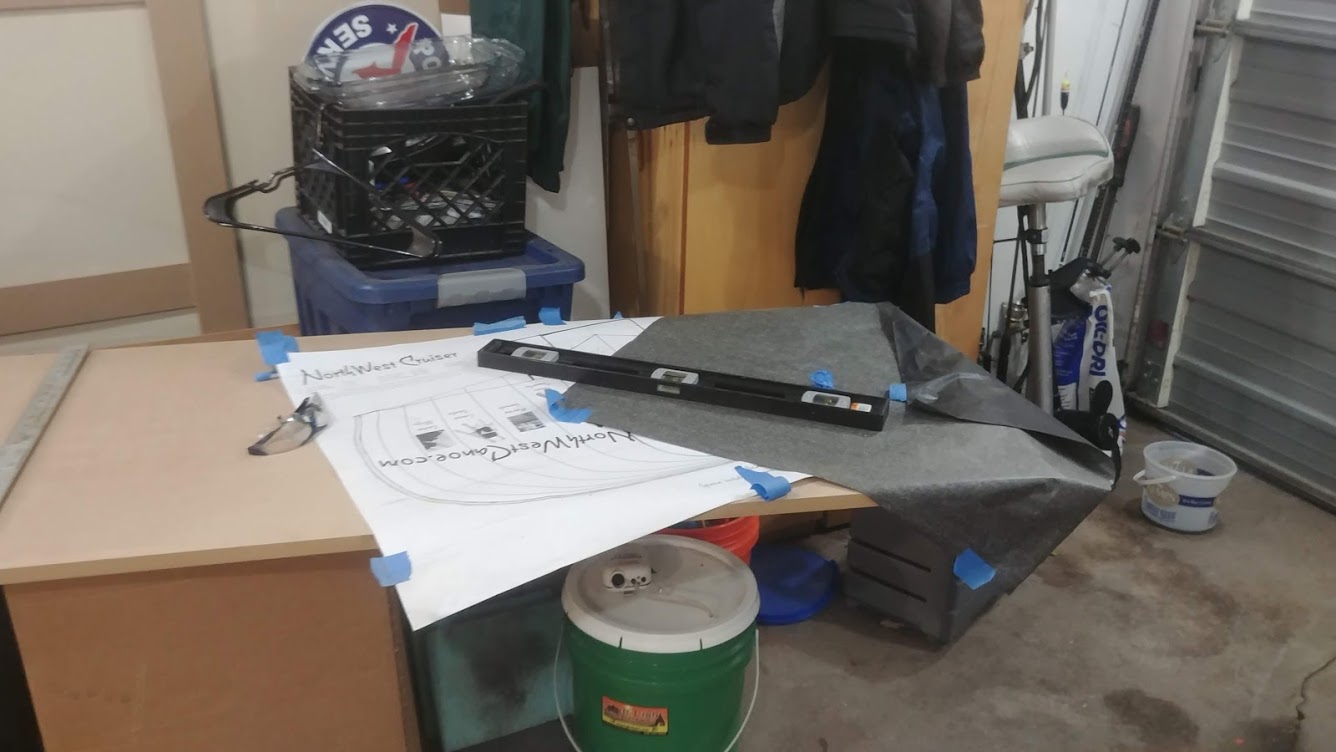
Beginning the tedious process of tracing the design on the soon-to-be forms. I used 3/4″ MDF to make my forms because it's easy to shape and relatively inexpensive. I've seen others use plywood, and with how much dust I ended up making, I would consider that for future builds.
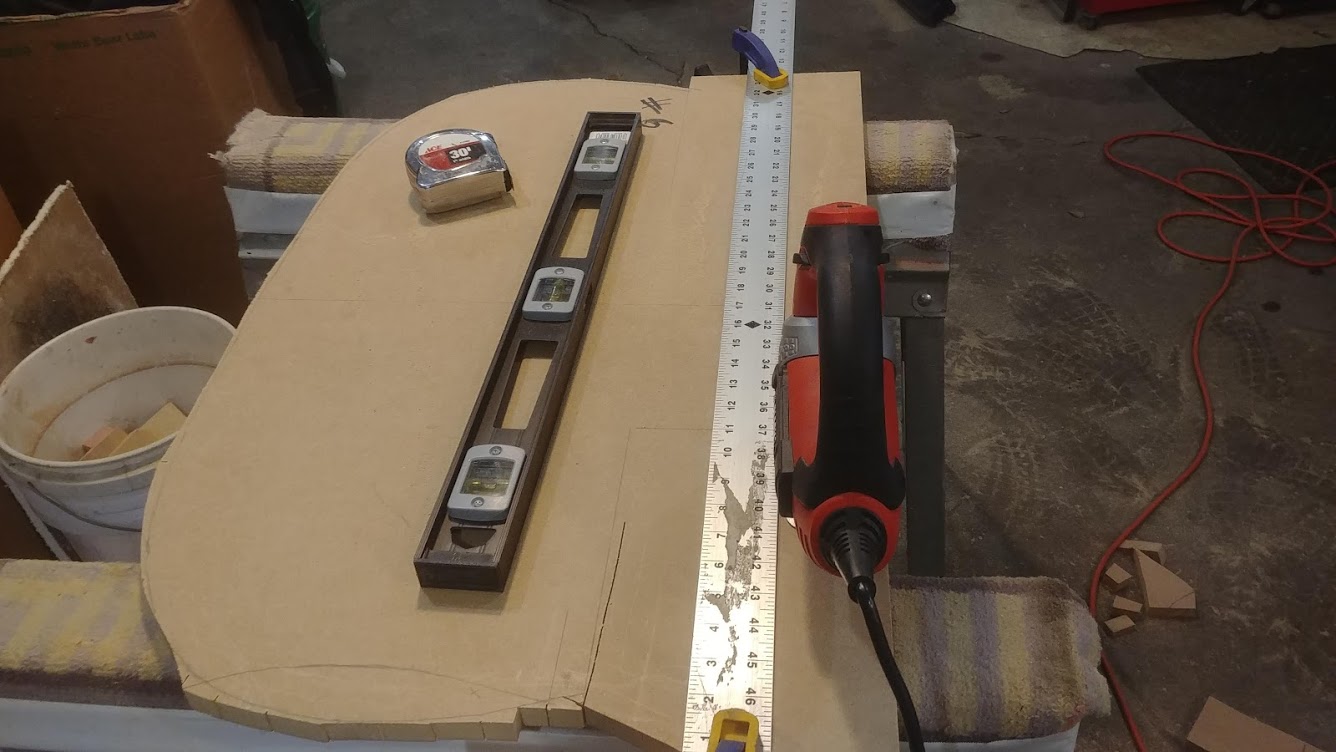
This form has been traced and I'm cutting it out with the jigsaw. This is slow-going but relatively precise.
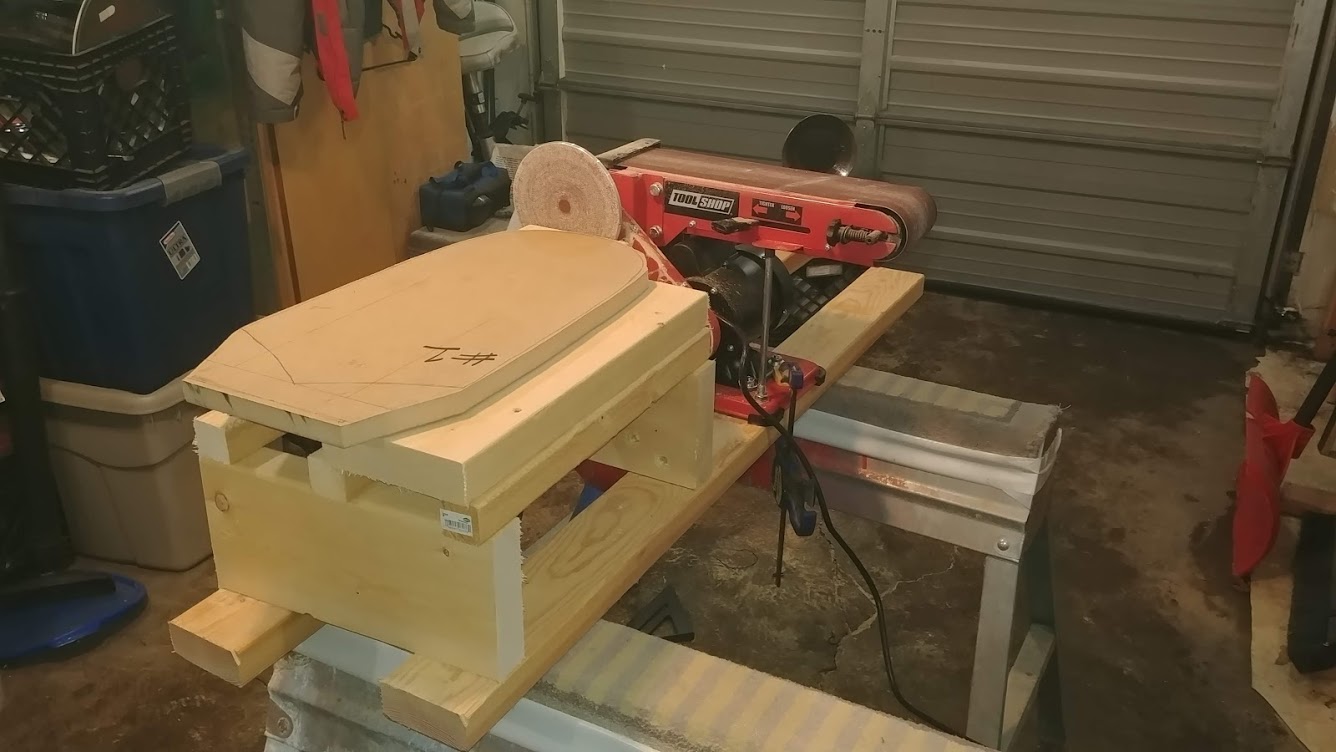
After they are cut out, the forms get sanded down to the line on the world's least-powerful disc sander. In hindsight, I wish I would've had a little more confidence with the jigsaw, because this was really slow going. If I would have gotten closer to the line, this would've gone a lot faster.
After all 15 forms were made, I moved all the forms down to my garage in Minneapolis and started work on my strongback table, which I'll document in the next post.
Building the strongback
By this point I am about 10% of the way through the canoe building process and two to three months behind schedule, but completely unphased because my confidence in my abilities never wavers.
By now, the frost had waned and winter had turned to spring. A move, car trouble, and 1.5 vacations significantly impeded my progress in the late winter months of early 2019.
The next step in the process is to build what is referred to as a strongback. It's basically just a really long table that you can attach your forms to. It's built to a comfortable height, so you can easily reach around the entire canoe to add your strips or spread your epoxy once it's time to fiberglass.
I chose a simple construction for my strongback that I could complete relatively quickly and easily. It consists of lengths of 1x6 attached to a beam made of really straight and dry 2x6s. Add some legs and the table component was completed very quickly, in only one weekend.
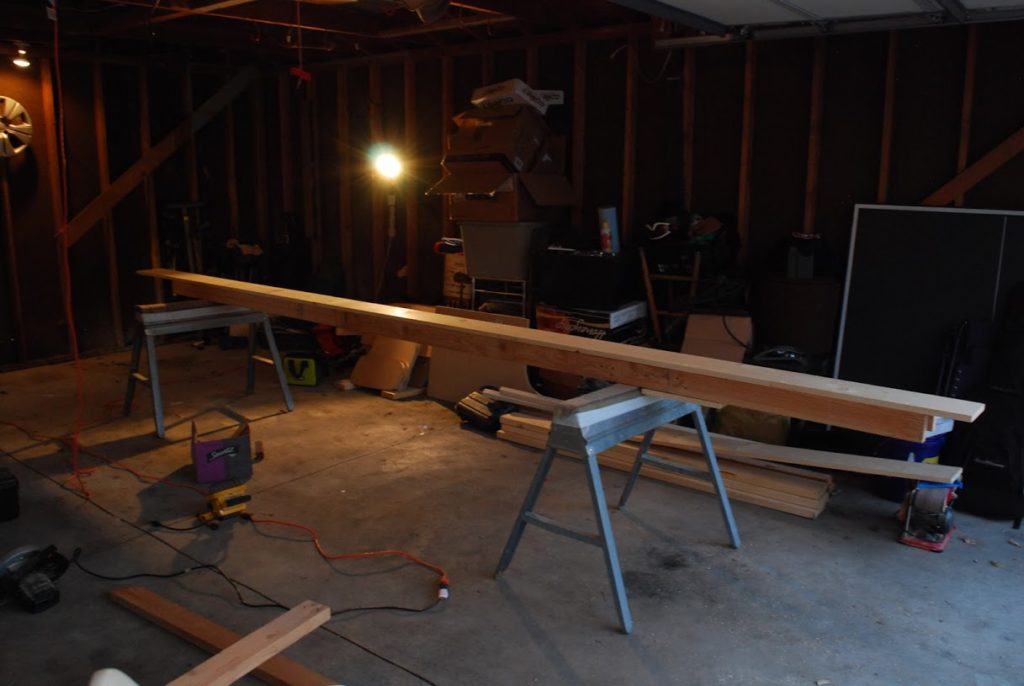
In the middle of strongback construction. This will get legs shortly after this picture was taken.
Not so simple was the process of spacing the forms on the completed strongback. It sounds simple in principle. You have 15 forms, 17 feet of canoe, the bow and stern forms are x" long, and the 1 and 15 forms attach to the bow and stern, respectively. It's easy, take how much space is left and divide it evenly between the remaining forms.
Reality, I discovered, is not always governed by such steadfast mathematical principles.
I spaced these forms incorrectly six times before getting it right. The first four were entirely of my own volition, before I entrusted the assistance of my engineer roommate. Mistake number five was a misinterpretation of said roommate's instructions, and mistake number six was me coming to the realization his instructions were also incorrect.
It's like they always say, "seventh time's the charm."
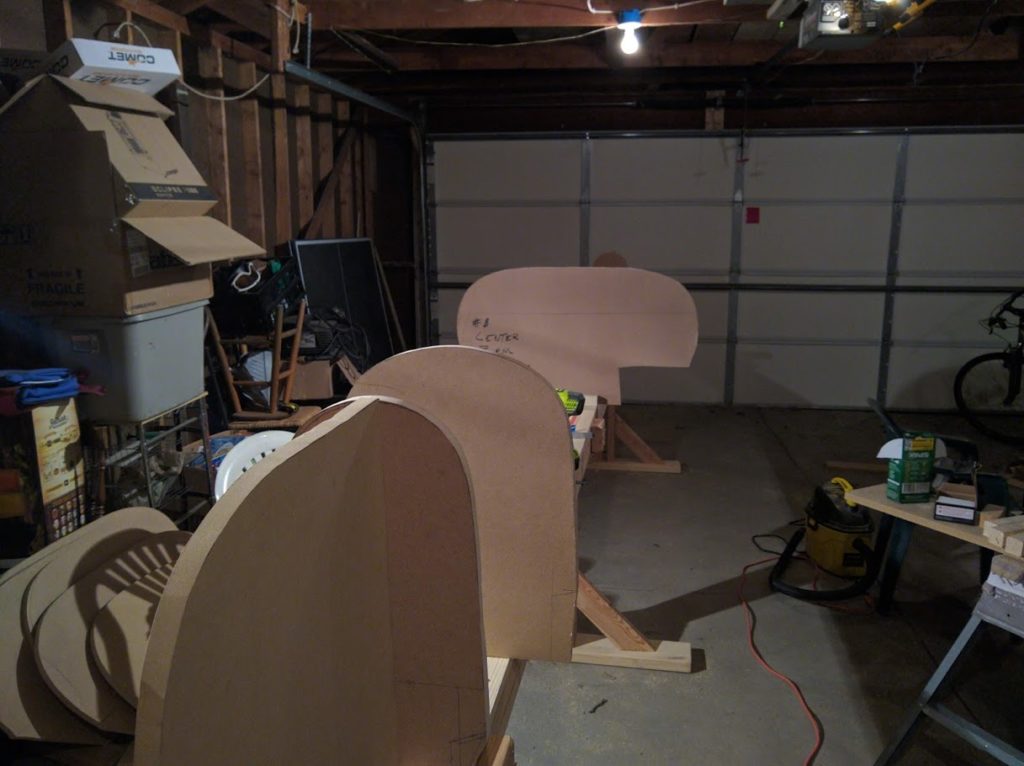
I miss living in the world where this picture was taken: before my ego was shattered by unsuccessfully attempting the pictured task six times.
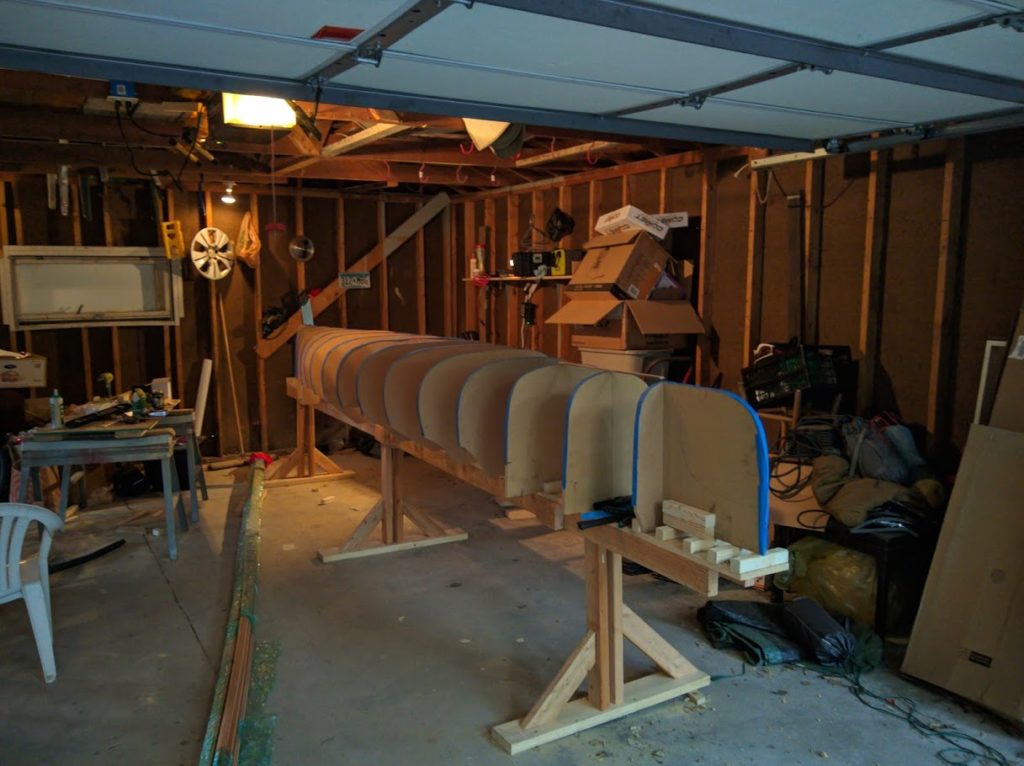
But I do like living in the world where my strongback is ready for CEDAR STRIPS! The blue painter's tape on the forms is to prevent the glue from adhering the cedar strips to the forms, which would make it so that the boat couldn't be removed.
STRIPPING
July 20, 2019
This article was lost when I changed web hosting companies, but here are some pictures to keep you entertained until I get around to re-writing it.
Editor's note: November 27, 2022: I still haven't re-written it.
July 5, 2026... any day now.